Achieve Fall-Off-The-Bone Oven Pork Ribs Every Time
Imagine biting into a succulent rib, the meat so tender it effortlessly slides off the bone, melting in your mouth with a symphony of savory and sweet flavors. This isn't just a dream reserved for barbecue joints; it's an achievable reality right in your own kitchen. Mastering how to prepare truly magnificent
pork ribs in the oven is simpler than you might think, transforming a humble rack into a show-stopping centerpiece for any meal. Forget complex smokers or finicky grills – your oven is a powerful tool for delivering that coveted fall-off-the-bone tenderness and rich, satisfying flavor that will have everyone reaching for more.
This comprehensive guide will demystify the process, providing you with the knowledge and techniques to create oven-baked pork ribs that rival any pitmaster's best. From selecting the right cut to perfecting cooking temperatures and enhancing flavors, we'll equip you with everything you need to bake pork ribs that are consistently tender, juicy, and utterly delicious.
Understanding Your Ribs: The Foundation of Flavor and Tenderness
Before you even think about oven temperatures or seasoning, a true rib aficionado knows that understanding the cut of meat is paramount. Different types of pork ribs react differently to cooking, influencing both cook time and texture.
*
Baby Back Ribs: These are cut from the top of the rib cage, close to the loin. They are smaller, leaner, and more curved than spare ribs, offering delicate tenderness. Because of their lower fat content and size, they cook relatively faster and are often a popular choice for those seeking a quicker path to deliciousness.
*
Pork Spare Ribs: Originating from the belly section, these ribs are larger, flatter, and contain more meat and a higher fat content than baby back ribs. This extra fat translates to a richer, more profound flavor, but it also necessitates a longer cooking time to properly render and break down connective tissues.
*
St. Louis-Style Ribs: This isn't a different cut, but rather a trimmed version of spare ribs. The sternum bone, cartilage, and excess fat are removed, resulting in a more uniform, rectangular rack that's easier to handle and cooks more evenly. They offer the great flavor of spare ribs with a more manageable shape.
Regardless of your chosen cut, the ultimate goal is to break down the tough connective tissues (collagen) into gelatin and render the fat. This transformation is what makes ribs incredibly tender. A crucial step often overlooked is removing the "silver skin" – a thin membrane on the underside of the ribs. While not harmful, it can become tough and chewy when cooked, preventing rubs and marinades from fully penetrating the meat. Simply slide a knife under one edge and pull it off with a paper towel for a better cooking experience.
Mastering the Heat: Temperature & Time for Perfect Tenderness
The secret to fall-off-the-bone pork ribs in the oven lies squarely in controlling the cooking environment – specifically, the temperature and duration. This interplay is vital for achieving that desired melt-in-your-mouth texture. For a deeper dive into the specifics, check out our guide on
Oven Pork Ribs: Master Temperature & Time for Perfect Tenderness.
Generally, you'll choose between two primary oven temperature ranges:
The "Low and Slow" Method (225°F – 250°F)
This is the gold standard for achieving maximum tenderness, particularly for fattier cuts like spare ribs. Cooking at a lower temperature over a longer period allows the collagen to slowly and thoroughly convert into gelatin, resulting in an incredibly moist and forgiving final product.
*
Ideal For: Pork Spare Ribs, St. Louis-Style Ribs, or when you have ample time.
*
Benefits: Superior tenderness, very forgiving, even cooking, deep flavor development.
*
General Cook Time: 4 – 5 hours for spare ribs, potentially a bit less for St. Louis-style.
The "Higher Temperature" Method (300°F – 350°F)
When time is a factor, a slightly higher temperature can significantly speed up the cooking process. While still producing tender ribs, it requires a bit more vigilance to prevent drying out.
*
Ideal For: Baby Back Ribs, or when you need dinner on the table sooner.
*
Benefits: Faster cooking time, still yields tender results.
*
General Cook Time: 2 – 3 hours for baby back ribs.
While an internal temperature of 145°F is the safe minimum for pork, for ribs to achieve that fall-off-the-bone texture, you're actually aiming for much higher – typically between 195°F and 205°F. This is the range where connective tissues have fully broken down. A good meat thermometer is your best friend here, but the "wiggle test" (gently lifting the rack with tongs – if it bends significantly and looks like it's about to break, it's ready) is also a reliable indicator.
The Secret Sauce: Techniques for Unbeatable Tenderness and Flavor
Beyond just temperature, the technique you employ plays a significant role in retaining moisture and infusing flavor into your pork ribs.
The Foil-Wrapped Method: Steaming to Perfection
This is arguably the most popular and effective method for cooking incredibly tender
pork ribs in the oven. Wrapping the ribs tightly in foil creates a steamy environment that locks in moisture, allowing the ribs to essentially braise in their own juices (and any added liquids) until they are impossibly tender.
Here's a step-by-step guide:
1.
Preheat Oven: Set your oven to your desired temperature (225°F – 250°F for spare ribs, 300°F – 350°F for baby back ribs).
2.
Prepare the Ribs: As mentioned, remove the silver skin from the back of the ribs. Pat the ribs dry with paper towels – this helps your rub adhere better.
3.
Season Generously: Apply your favorite dry rub liberally to all sides of the ribs. Don't be shy! This is where much of your base flavor will come from. For an extra layer of flavor and moisture, consider adding a splash of liquid inside the foil – apple cider, apple juice, beer, or chicken broth work wonderfully.
4.
Wrap Tightly: Place the seasoned ribs, bone-side up or down (some prefer bone down to protect the meat from direct heat), onto a large sheet of heavy-duty aluminum foil. Use enough foil to completely enclose the ribs, crimping the edges tightly to create a sealed packet. You might even use a double layer of foil to prevent punctures and ensure no steam escapes.
5.
Bake: Place the foil-wrapped ribs on a baking sheet (to catch any potential drips) and bake for the designated time based on your rib type and temperature.
6.
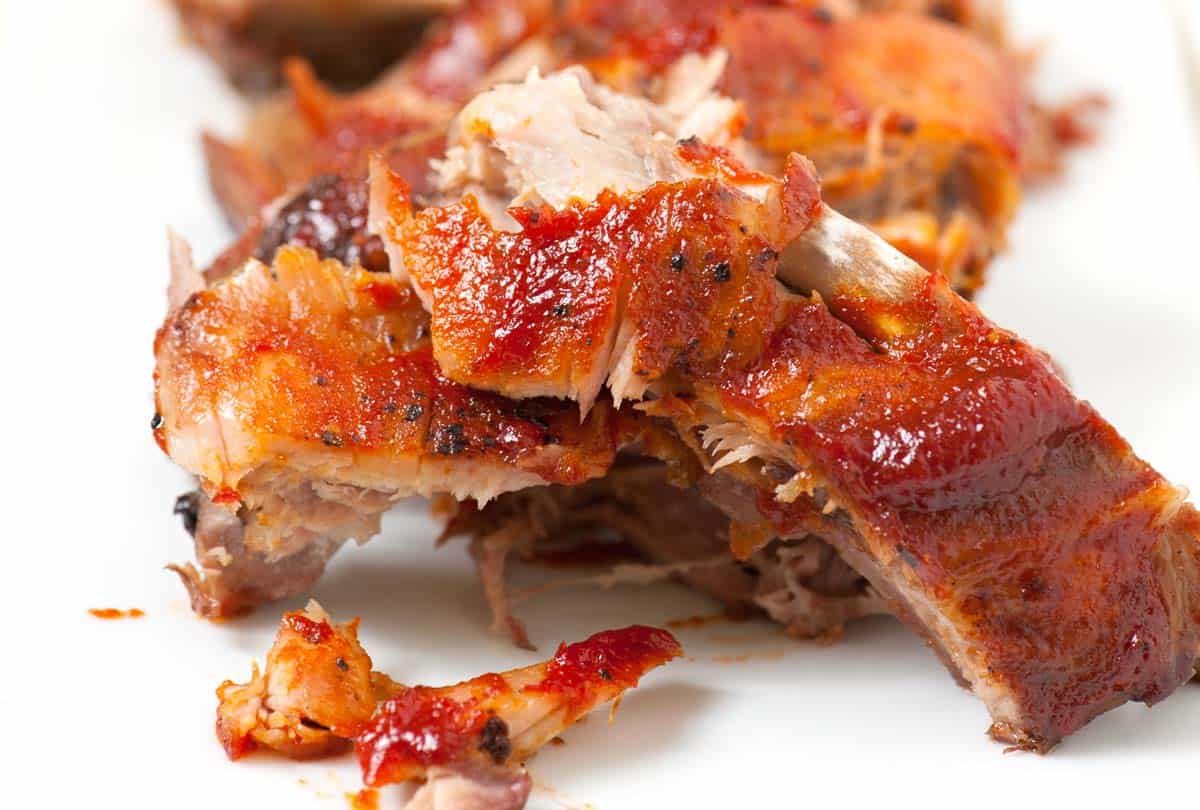
Finish for Flavor and "Bark": Once the ribs are tender (perform the wiggle test!), carefully unwrap the foil. Drain any accumulated liquid if desired, or save it for basting. For a fantastic caramelized crust and sticky glaze, slather the ribs with your favorite barbecue sauce during the last 30-60 minutes of cooking, or finish them under the broiler for 5-10 minutes, watching carefully to prevent burning. This final step creates that desirable "bark" and sticky outer layer.
Beyond the Basics: Elevating Your Oven Rib Game
While the foil-wrapped method guarantees tenderness, several other elements contribute to truly unforgettable oven-baked pork ribs. For more insights into tailoring your approach to specific cuts, explore
Baby Back vs. Spare Ribs: Best Oven Methods & BBQ Sauce Secrets.
The Power of Rubs and Marinades
*
Dry Rubs: These spice blends are essential for building a flavorful crust. Common ingredients include paprika, brown sugar, garlic powder, onion powder, chili powder, salt, and black pepper. The sugar in many rubs helps caramelize the surface during the final cooking stage. For best results, apply the rub at least an hour before cooking, or even better, the night before, allowing the flavors to penetrate deeply.
*
Marinades: While less common for ribs than dry rubs, marinades (especially those with acidic components like vinegar, citrus, or even soda) can help tenderize the meat and infuse flavor. They are particularly effective for leaner baby back ribs if you want an extra boost of moisture and taste.
The Magic of Barbecue Sauce
A good barbecue sauce transforms humble ribs into a finger-licking feast. Whether homemade or store-bought, timing is key. Apply the sauce during the last phase of cooking – after the ribs are already tender. This prevents the sugars in the sauce from burning during the long, slow cook. For a beautiful glaze, apply sauce every 15-20 minutes during the final 30-60 minutes of baking, or during the broiling stage.
Pro Tips for Success:
*
Don't Rush the Rest: Once your ribs are out of the oven, cover them loosely with foil and let them rest for 10-15 minutes. This allows the juices to redistribute throughout the meat, resulting in an even more tender and moist rib.
*
Invest in a Thermometer: While not strictly necessary for "fall-off-the-bone" (which is more about texture than food safety temp), a reliable meat thermometer helps you understand your oven's true temperature and ensures consistent results.
*
Avoid Crowding: If cooking multiple racks, ensure they have enough space in the oven for even heat circulation. If your oven is too crowded, cook times may increase, and results can be inconsistent.
*
Experiment with Flavor: Don't be afraid to try different rubs, sauces, and even liquids inside your foil packet. A splash of beer, balsamic vinegar, or even hot sauce can add unique dimensions to your ribs.
Conclusion
Creating fall-off-the-bone pork ribs in your oven is not just a culinary feat; it's an enjoyable process that yields incredibly rewarding results. By understanding the types of ribs, mastering the crucial balance of temperature and time, embracing the effective foil-wrapped method, and experimenting with robust rubs and delicious sauces, you're well on your way to becoming a home rib hero. So, roll up your sleeves, preheat that oven, and prepare to delight your taste buds with succulent, tender ribs that effortlessly slide from the bone, proving that the best barbecue can indeed come from your very own kitchen. Happy rib making!